
When is Butternut Squash Ripe? How to Grow, Harvest, and Cook Winter Squash
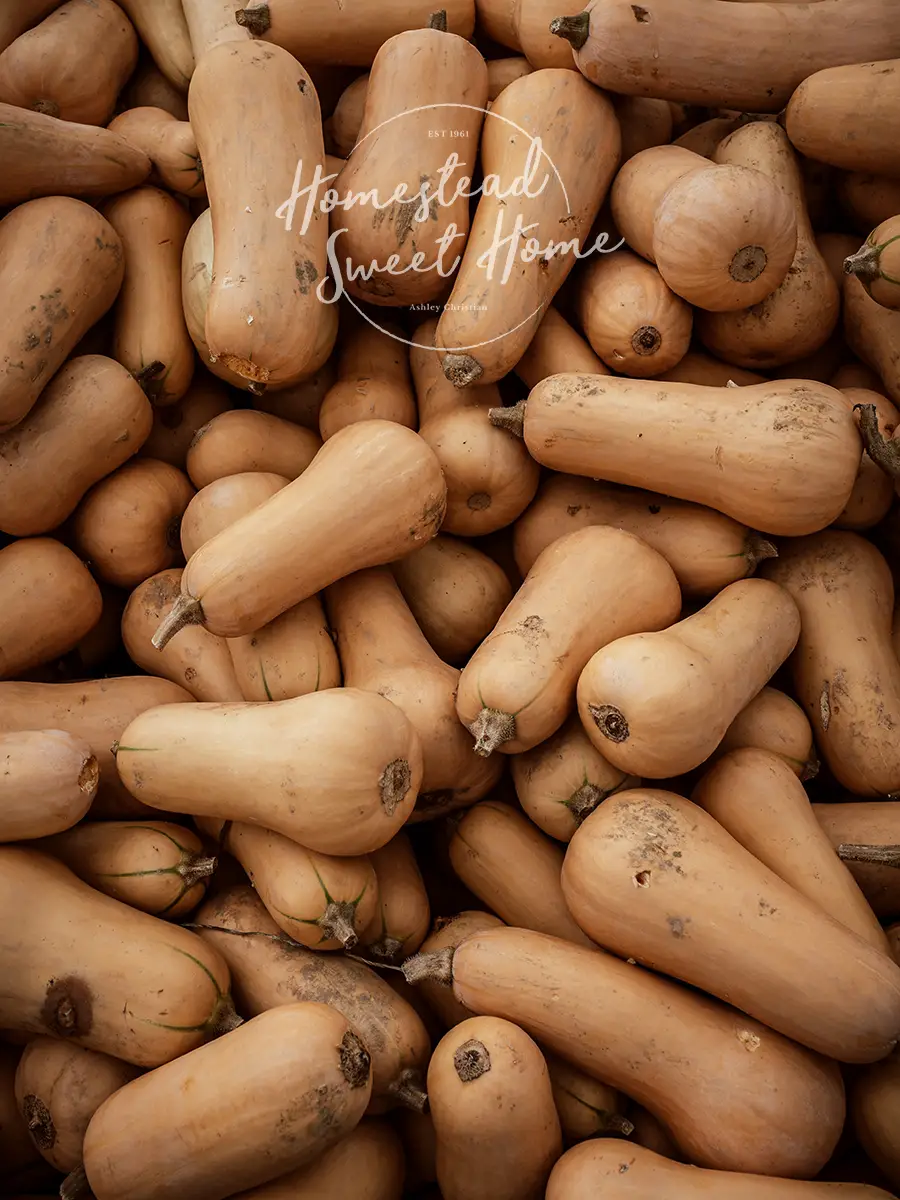
With its hard rind, it’s sometimes difficult to tell when butternut squash is ripe. But there are some simple tells in the stem and rind you can watch for to know when your butternut squash is perfectly ripe. If you love numbers, you can also follow your calendar and get an exact window of when your squash is ready to harvest. Read on to learn how to tell when squash is ripe, how to grow it, and how to cook delicious dishes with this rich, nutty winter squash.
When is Butternut Squash Ripe?
Have you tasted the difference between an organically homegrown butternut squash picked at peak ripeness, and a conventionally grown squash that’s ripened in transit and on a grocery store shelf? If you haven’t experienced the difference I hope you grow some squash yourself or pick some up at a farmer’s market. They don’t even taste like the same food. And there is evidence that organically grown produce is nutritionally more dense and flavorful than produce grown with fossil fuel-based synthetic fertilizers and pesticides.
Vine-ripened butternut squash will taste sweet, creamy, nutty, and rich. A butternut squash picked too early will be flavorless and tough, and one picked too late will be mushy or even dry. To avoid a tough or mushy squash, here are my expert gardener’s tips to know when your butternut is ripe on the vine and ready for harvest.
The Stem Dehydrates
Watching the stem of developing butternut squash is the most reliable way to know if your squash is ripe. If you’re visiting your garden regularly and weeding for the recommended 15 minutes each day, you will get to know the look and feel of your plants and easily detect the changes that happen during ripening.
While the butternut squash is growing and connected to the vine, the vine will be plump and green as it’s transferring nutrients to the growing squash. Once this process is complete, the vine will begin to turn brown and dehydrate. Eventually, it will shrivel and easily detach from the squash. You’ll want to harvest your squash when you begin seeing these changes. If you wait until the vine has completely shriveled, you’ll risk an over-ripened squash.

The Rind Hardens and Turns Golden Brown
Like the stem hardening and changing color, the rind, or outer shell of the butternut squash will harden and change from yellow/green to a rich golden tan color. This hardening and changing color of the rind will happen alongside the changes in the stem. As you observe this shift, you know your butternut squash is ready for harvest.
To test the hardness of the rind, you can push on it with your fingers or knock on it with your knuckles. It should be hard to touch without any give. While you are testing the rind for hardness, be careful not to damage the rind with your fingernails as this breaks the protective barrier around your food keeping bacteria and mold out.
When tapping the rind, it should sound hollow. This is a sign your butternut squash is full of water and perfect for picking.
Check the Weight and Days to Maturity
If you’re the type that likes to rely more on numbers and measures than feel and touch, I’ve got some tips for you. Save your seed package and note the days to harvest and do a google search of the finished weight of your squash variety. Using a portable kitchen scale and your calendar, you can get a sense of how close you are to harvest by weight and date.
I highly recommend you keep a garden journal with a page for each food you are growing. Write down everything you know about it from the seed package and growing instructions from your local extension office that will give you growing tips specific to your area and hardiness zone. In your garden journal also record when you planted, and when your harvest window is. Gardening is a commitment to failure and learning, and your journal will be invaluable in that process.
Typically butternut squash grows from seed to harvest in about 110-120 days, but this depends on your variety so find the specifications for your seeds. You can also watch and note in your journal when your butternut squash flowers bloom, as harvest is typically 50 to 55 days after your fruit sets. Generally, butternut squash is ready to harvest around the same time pumpkins and other gourds are ready to be harvested.
How to Harvest and Store Butternut Squash
Once you’ve determined your butternut squash is ripe and ready to be harvested, cut the stem about two inches from the base of the squash. If you timed it right, this stem should still be attached and will help your squash store longer. By leaving two inches of the stem attached, you are protecting your harvest from mold and bacteria.
If you’ve left your squash for too long on the vine and it’s shriveled or moldy, do not eat it. It will be a great addition to the compost pile which is gardening gold and will fertilize your next crop. Nothing goes to waste in a garden, not even our failures.
If you’ve accidentally picked your butternut squash too early, you can leave it on the counter in sunlight if possible, to finish the ripening process over the next 8 to 10 days. Turning the squash every day may help the process of ripening move along evenly and quickly. You can use the same look and feel techniques with squash picked early, to tell when it has finished ripening off the vine.
Once you’ve picked and ripened your butternut squash, it can be stored for 2 to 4 months at 50 degrees. A moderate garage or root cellar is ideal for storing butternut squash through the winter. When storing whole butternut squash, turn them weekly, and take care they are not touching each other, to help prevent potential rot from spreading. You can also freeze raw or cooked butternut squash, or try your hand and canning.
How to Grow Healthy Butternut Squash
One healthy butternut squash plant can produce 10 to 20 squash. Growing a plant yourself is easier than you think and a very rewarding process. Getting in the garden helps us to slow down our hectic modern lifestyles, and reconnect with our food. To grow butternut squash, you’ll simply need to pick a good spot, time planting according to your zone, and fertilize with compost, and water once a week.
Butternut squash takes a long time to ripen, so if you live in a cold northern climate with a short growing season, you’ll want to start your butternut squash seed indoors or in a small greenhouse 6 weeks before your last frost date. Once your seedlings are ready to transplant, be sure to harden them off by taking increasingly longer trips outside so they don’t die from transplant shock.
If you live in a warmer climate with a longer growing season, you can start your seeds directly in the ground or in a raised bed or large container. Either way, you’ll want to plant in an area that gets full sun with well-draining soil that’s been fertilized with organic matter like compost or blood meal.
When it comes to spacing butternut squash seeds, there are two common methods you can follow. The first is to make hills or mounds 18 inches high and plant a group of 4 to 5 seeds in each mound, spaced about 4 inches apart from each other, and at a depth of ½ to 1 inch. Each of these mounds can be spaced about 8 feet apart. Once the plants are growing, thin each group down to the 2 or 3 strongest plants.
The second method does not use mounds or hills. Simply space seeds 18 to 36 inches apart and plant at a depth of ½ to 1 inch deep. Plant 2 to 3 seeds per hole, and thin to the 1 strongest plant as they grow.
Depending on the variety, butternut squash seeds typically take 5 to 10 days to germinate, during which you will want to water lightly every day. Once they have sprouted, you can water them more deeply less often. Established gardens like about 1 inch of water once per week, adjusting for rainfall. Butternut squash leaves like to stay dry, so water with soaker hoses or a hose extension at the base of the plant.
Squash are heavy feeders, so adding compost tea or organic liquid fertilizer to your plants every two to three weeks will keep them healthy and strong. It’s also important to check your plants regularly for squash bugs that like to attach themselves under leaves. You can remove them with a damp cloth. I like to make a habit of spending at least 15 minutes in the garden every day to stay ahead of the weeds and pests and learn more about my plants as I watch them grow.
How to Roast Butternut Squash
Our family’s favorite way to eat butternut squash is to roast it. Roasting butternut squash brings out the natural sweetness in the vegetable and gives it a rich, delicious flavor. Not only is roasting butternut squash the easiest way to cook it, but it also becomes very versatile.
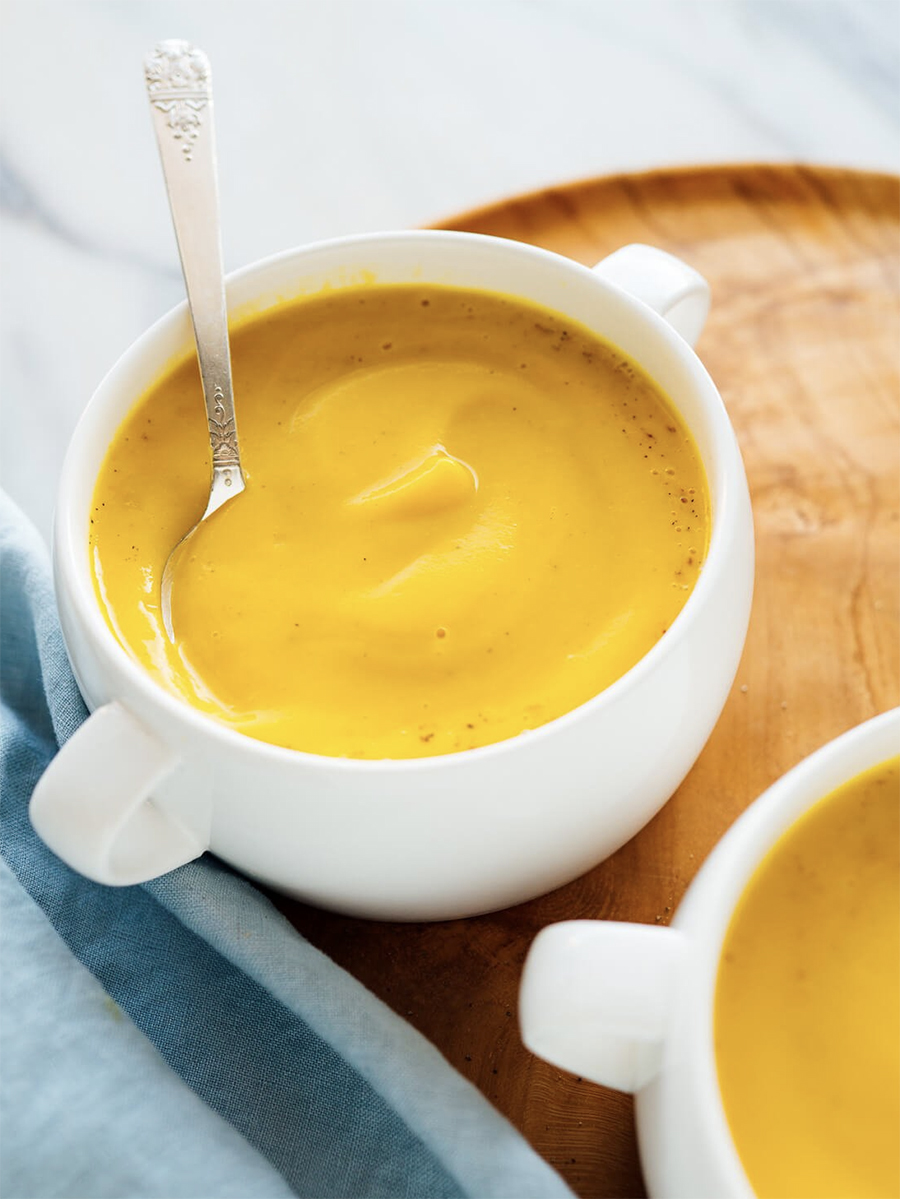
You can use roasted butternut squash in salads or as a side. Or it can be pureed and become the base to soups, or my favorite, mashed squash as a lower glycemic, richer tasting alternative to mashed potatoes. It’s easy to freeze once roasted so you can save it for delicious winter soups and mashes long after your harvest is over.
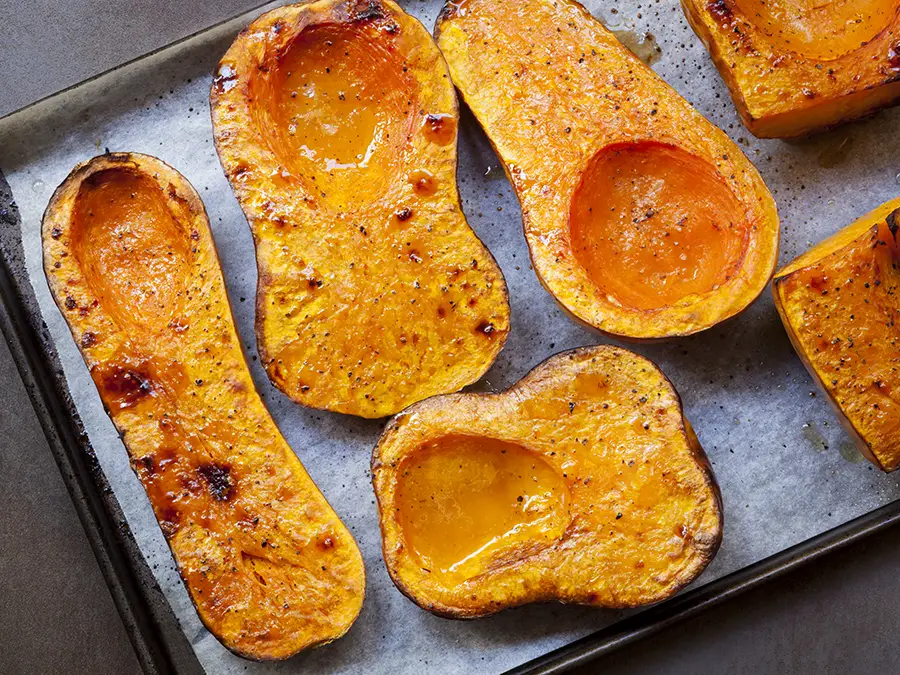
Step 1: Preheat the oven to 425 degrees and line a baking tray or glass baking dish with parchment paper. Butternut squash leaks a lot of juice while roasting and it’s nice to skip the scrubbing step at clean up and simply throw away the parchment paper.
Step 2: You can bake your butternut squash whole after poking a few holes in it and baking for 60 to 90 minutes, or you can cut your squash in half length-wise, which is my preferred method. I like cutting in half and baking because it bakes in 45 to 60 minutes, cooks more evenly, and I’m able to more easily monitor and test when it’s done.
Step 3: Your squash is done when a fork can slide easily through the flesh. For use in side dishes and salads, I prefer a more firm squash. And for use in purees, mashes, and soup, I prefer a more done squash.
Step 4: Once your squash has cooled enough to be easily handled, cut it in half if you haven’t already, scoop out seeds, and set them aside. The roasted seeds are excellent in salads, on top of soups, or for snacking. Scoop the cooked squash out of the rind, and place your rind in the compost pile.
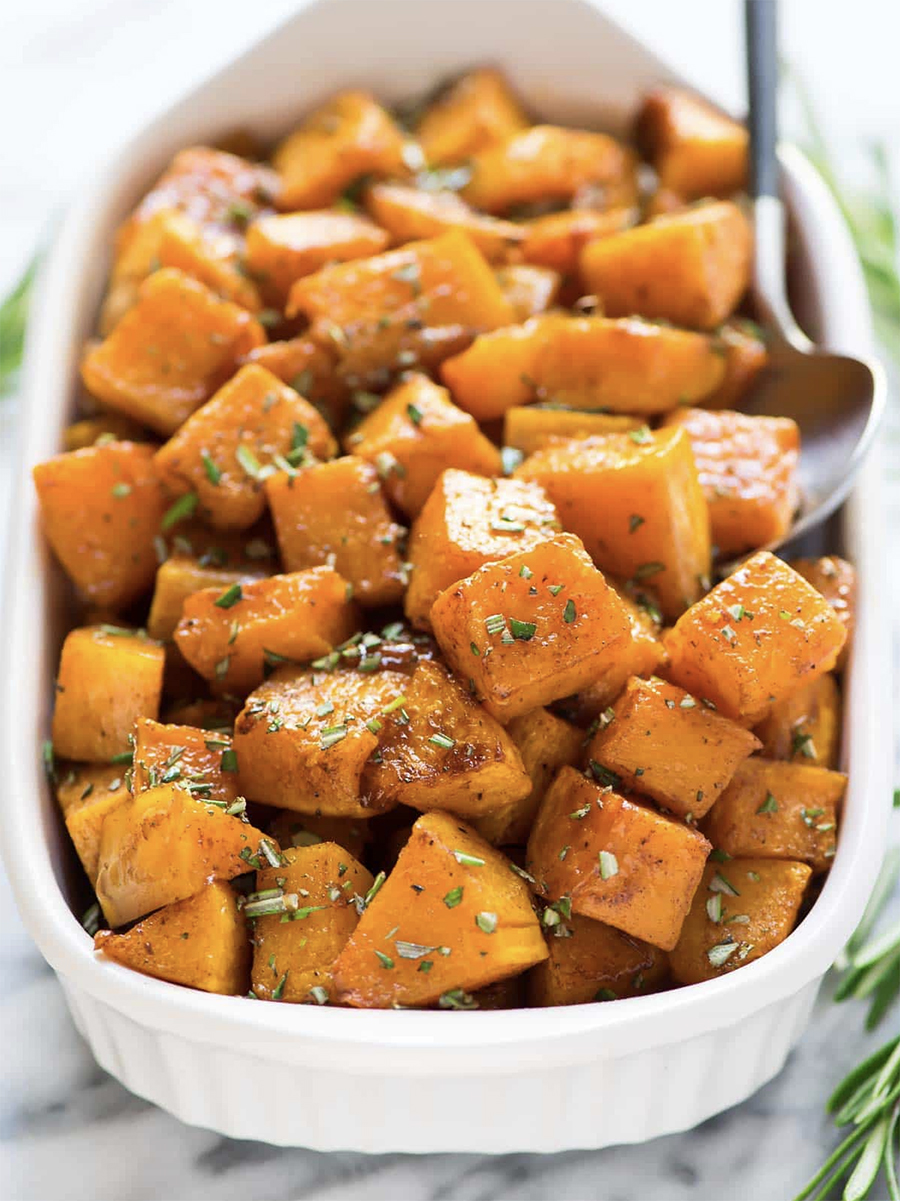
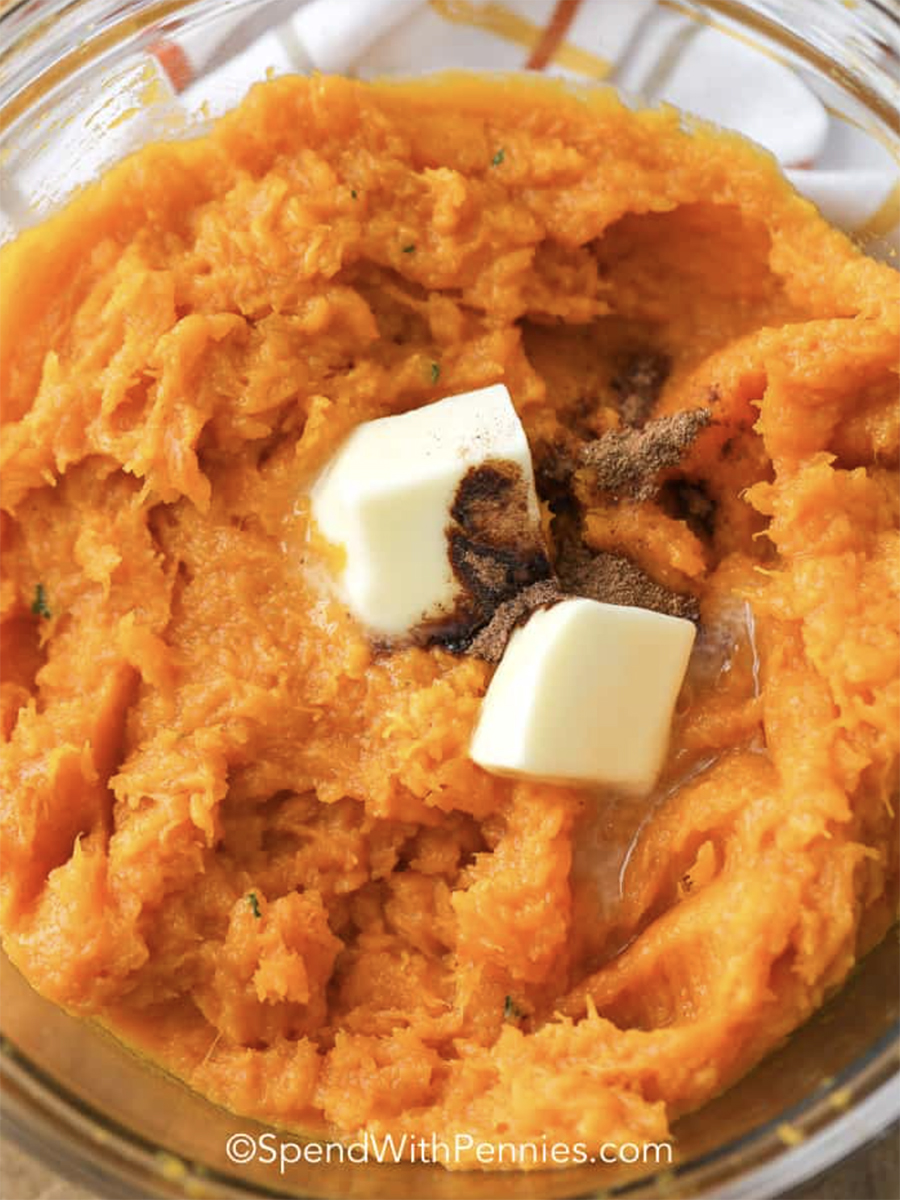
Step 5: Cube your more firm squash and season with salt, pepper, garlic, and butter for sides or salads. Or puree more well-done squash to use now, or freeze for soups and mashes.
It’s really that easy! Don’t overthink it. Just pop it in the oven and roast. Imagine having a whole stash of frozen roasted butternut squash you grew organically yourself you can use all winter long and through the early spring until your garden begins to produce fresh veggies again!
Butternut Squash Recipes
Need more ideas? I’ve got you covered!
Try this amazing Cinnamon Rosemary Roasted Butternut Squash recipe from Well Plated.
Or this fabulous Roasted Butternut Squash Soup from one of my favorite clean cooking chefs, Cookie and Kate.
I prefer this Mashed Butternut Squash for Thanksgiving over traditional high glycemic mashed potatoes. It’s much better for your metabolism AND tastes so much richer too.
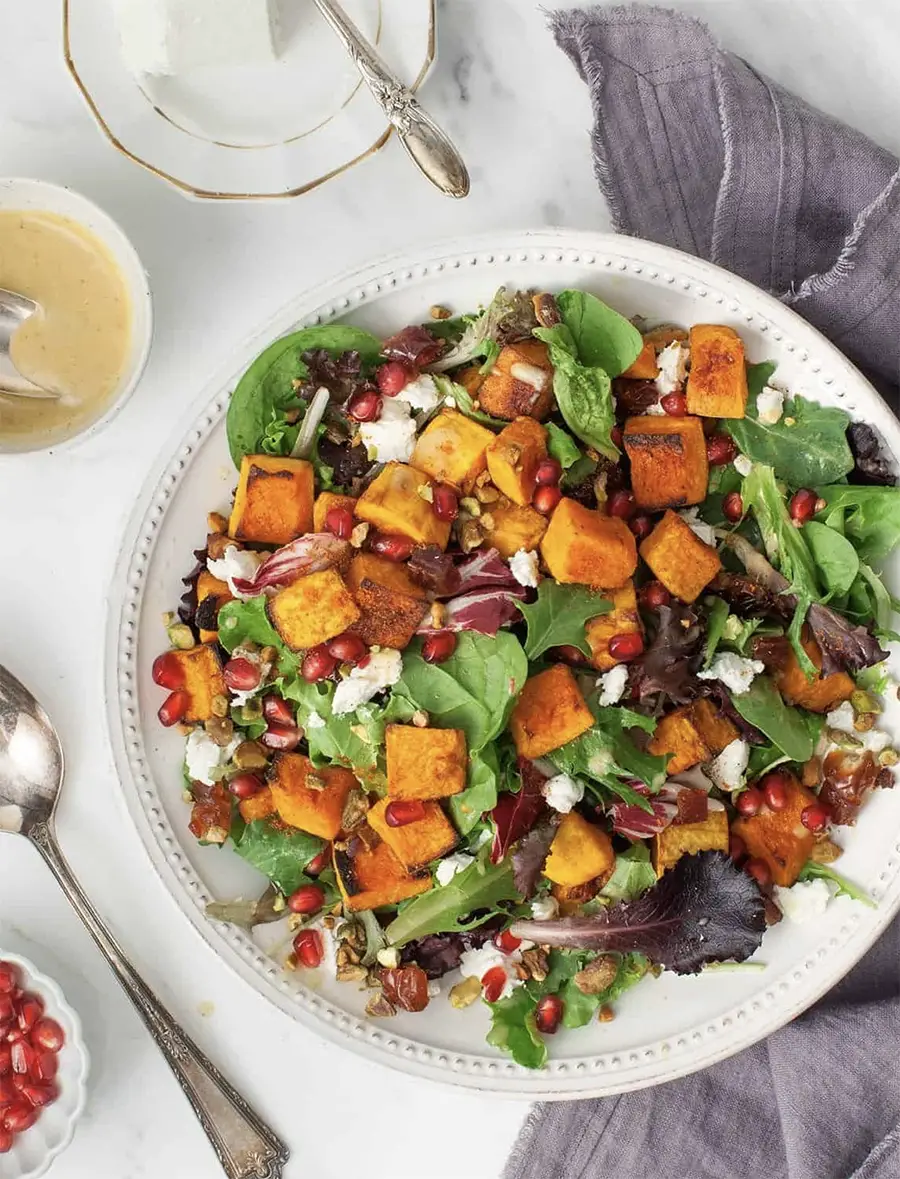
Or use your garden greens for this fall-inspired Pomagranete Butternut Salad.
What about you, have you grown butternut squash before? What is your favorite method of testing when they are ripe? How do you like to prepare it? Let us know your experience in the comments below.
Leave a Reply